Frp内网穿透搭建和使用
[TOC]
一. 简介和注意点
二. 搭建部署(0.24.1)
1. 服务端部署
第一种部署方式:安装包
- 下载安装包
1
2
3
4
5
6
7
8
9
10
11
12
# 设置shell环境变量frp版本
export FRP_VERSION=0.24.1
# 下载并解压为frps
wget https://github.com/fatedier/frp/releases/download/v${FRP_VERSION}/frp_${FRP_VERSION}_linux_amd64.tar.gz \
&& tar -xf frp_${FRP_VERSION}_linux_amd64.tar.gz \
&& mkdir frps \
&& cp frp_${FRP_VERSION}_linux_amd64/frps* frps/ \
&& rm -rf frp_${FRP_VERSION}_linux_amd64*
# 进入目录
cd frps - 修改配置文件
frps.ini1
2
3
4
5
6
7
8
9
10
11
12
13
14
15
16
17
18
19
20
21
22
23
24
25
26
27
28
29
30
31
32
33
34
35
36
37
38
39
40
41
42
43
44
45
46
47
48
49
50
51
52
53
54
55
56
57
58
59
60
61
62
63
64# [common] is integral section
[common]
# 服务ip地址
# frp的服务端口号
bind_addr = 0.0.0.0
bind_port = 7000
# udp 端口
bind_udp_port = 7001
# kcp绑定的端口,可以和 bind_port 一样
kcp_bind_port = 7000
# specify which address proxy will listen for, default value is same with bind_addr
# proxy_bind_addr = 127.0.0.1
# 设置http和https穿透的服务端口
# 注意:http端口和https端口可以与bind_port相同
vhost_http_port = 7000
vhost_https_port = 7000
# http服务器响应头超时(秒),默认为60s
# vhost_http_timeout = 60
# frps控制台
# dashboard_addr的默认值与bind_addr相同
# 只有设置了dashboard_port,仪表板才可用
dashboard_addr = 0.0.0.0
dashboard_port = 7500
# frps控制台 用户名密码,默认都为 admin
dashboard_user = admin
dashboard_pwd = admin
# 日志文件
log_file = ./frps.log
# 日志级别:trace, debug, info, warn, error
log_level = info
# 日志保存天数
log_max_days = 3
# frps的认证密码,用于客户端连接
token = 12345678
# heartbeat configure, it's not recommended to modify the default value
# the default value of heartbeat_timeout is 90
# heartbeat_timeout = 90
# 可以配置允许使用的某个指定端口或者是一个范围内的所有端口,以 , 分隔,指定的范围以 - 分隔。
# allow_ports = 2000-3000,3001,3003,4000-50000
# 设置每个代理可以创建的连接池上限,客户端设置超过此配置后会被调整到当前
max_pool_count = 5
# 每个客户端可以使用最大端口,默认值为0表示没有限制
max_ports_per_client = 0
# frps子域名设置,默认为空,可以输入类似abc.com这样的域名
subdomain_host =
# 是否tcp流多路复用
tcp_mux = true - systemctl来控制启动,并且加入自启
- 执行命令
1
vi /lib/systemd/system/frps.service
- 加入内容
1
2
3
4
5
6
7
8
9
10
11
12[Unit]
Description=fraps service
After=network.target syslog.target
Wants=network.target
[Service]
Type=simple
#启动服务的命令(此处写你的frps的实际安装目录)
ExecStart=/your/path/frps -c /your/path/frps.ini
[Install]
WantedBy=multi-user.target - 自启动命令
1
2
3
4# 启动命令
systemctl start frps
# 自启动设置
systemctl enable frps第二种部署方式:docker
- docker配置地址:https://github.com/chcGolang/frps
- DockerHub地址:https://hub.docker.com/r/chcgolang/frps
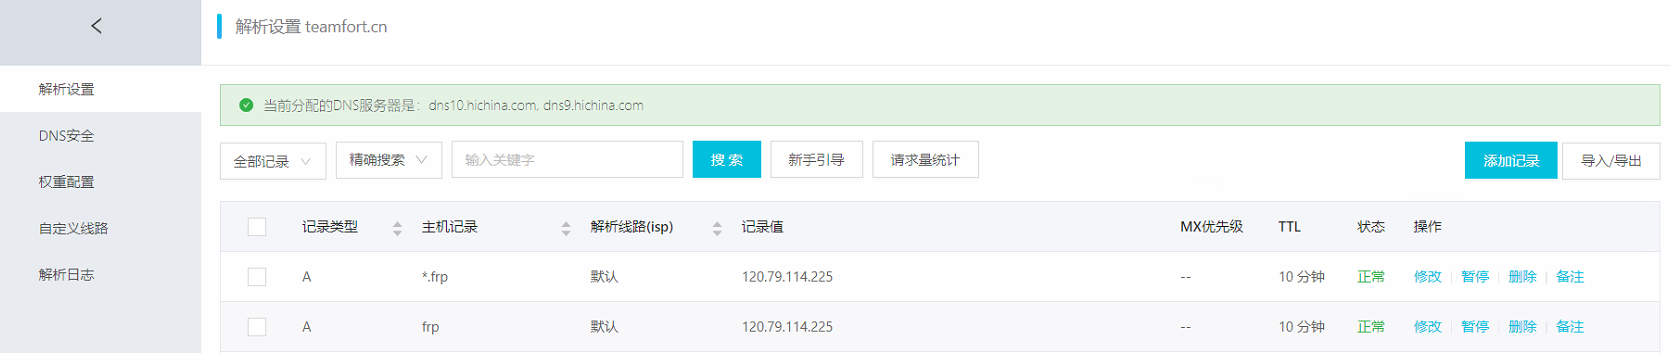
2. 域名配置
2. 客户端部署
1. 安装包的方式部署
linux
1
2
3
4
5
6
7
8
9
10
11
12# 设置shell环境变量frp版本
export FRP_VERSION=0.24.1
# 下载并解压为frps
wget https://github.com/fatedier/frp/releases/download/v${FRP_VERSION}/frp_${FRP_VERSION}_linux_amd64.tar.gz \
&& tar -xf frp_${FRP_VERSION}_linux_amd64.tar.gz \
&& mkdir frpc \
&& cp frp_${FRP_VERSION}_linux_amd64/frpc* frpc/ \
&& rm -rf frp_${FRP_VERSION}_linux_amd64*
# 进入目录
cd frpc配置文件
1
2
3
4
5
6
7
8
9
10
11
12
13
14
15
16
17
18
19
20
21
22
23
24
25
26
27
28
29
30
31
32
33
34
35
36
37
38
39
40
41
42
43
44
45
46
47
48
49
50
51
52
53
54
55
56
57
58
59
60
61
62
63
64
65
66
67
68
69
70
71
72
73
74
75
76
77
78
79
80
81
82
83
84
85
86
87
88
89
90
91
92
93
94
95
96
97
98
99
100
101
102
103
104
105
106
107
108
109
110
111
112
113
114
115
116
117
118
119
120
121
122
123
124
125
126
127
128
129
130
131
132
133
134
135
136
137
138
139
140
141
142
143
144
145
146
147
148
149
150
151
152
153
154
155
156
157
158
159
160
161
162
163
164
165
166
167
168
169
170
171
172
173
174
175
176
177
178
179
180
181
182
183
184
185
186
187
188
189
190
191
192
193
194
195
196
197
198
199
200
201
202
203
204
205
206
207
208
209
210
211
212
213
214
215
216
217
218
219
220
221
222
223
224
225
226
227
228
229
230
231
232
233
234
235
236
237# [common] is integral section
[common]
# 服务端的公网IP和端口号
server_addr = 0.0.0.0
server_port = 7000
# 通过http代理或者socks5代理来连接frps,你可以在这里或者全局环境变量中设置http_proxy
# 仅在 protocol = tcp 时生效。
# http_proxy = http://user:passwd@192.168.1.128:8080
# http_proxy = socks5://user:passwd@192.168.1.128:1080
# 日志记录文件
# log_file = ./frpc.log
# 日志级别trace, debug, info, warn, error
# log_level = info
# 日志保存天数
# log_max_days = 3
# frps的认证密码
token = 12345678
# 客户端管理视图
admin_addr = 0.0.0.0
admin_port = 7400
admin_user = admin
admin_pwd = admin
# 客户端预先建立连接
pool_count = 5
# tcp流多路复用,必须与frps相同
tcp_mux = true
# 代理名称将更改为{user}。
user = your_name
# 决定是否退出程序时,第一次登录失败,否则继续重新登录到frps
login_fail_exit = true
# 用于连接服务器的通信协议
# 现在它支持tcp和kcp以及websocket
protocol = tcp
# specify a dns server, so frpc will use this instead of default one
# dns_server = 8.8.8.8
# 指定dns服务器,因此frpc将使用此服务器而不是默认服务器
# start = ssh,dns
# heartbeat配置,不建议修改默认值
# the default value of heartbeat_interval is 10 and heartbeat_timeout is 90
# heartbeat_interval = 30
# heartbeat_timeout = 90
# ssh连接[里面的内容是唯一的]
# 如果[common]中的user不为空,则将其更改为{user}.{proxy}如'your_name.ssh
[ssh]
# 连接类型:tcp | udp | http | https | stcp | xtcp
type = tcp
local_ip = 127.0.0.1
local_port = 22
# frps和frpc之间的消息将被加密
# 如果公司内网防火墙对外网访问进行了流量识别与屏蔽,例如禁止了 ssh 协议等,通过设置 use_encryption = true,将 frpc 与 frps 之间的通信内容加密传输,将会有效防止流量被拦截。
use_encryption = false
# 压缩传输的数据
use_compression = false
# remote port listen by frps
# remote_port = 6001
# frps will load balancing connections for proxies in same group
# group = test_group
# group should have same group key
# group_key = 123456
# 启用健康检查,类型为 tcp
# health_check_type = tcp
# 建立连接超时时间(秒)
# health_check_timeout_s = 3
# 连续 3 次检查失败,此 proxy 会被摘除
# health_check_max_failed = 3
# 每隔 10 秒进行一次健康检查
# health_check_interval_s = 10
[ssh_random]
type = tcp
local_ip = 127.0.0.1
local_port = 22
# if remote_port is 0, frps will assign a random port for you
remote_port = 0
# if you want to expose multiple ports, add 'range:' prefix to the section name
# frpc will generate multiple proxies such as 'tcp_port_6010', 'tcp_port_6011' and so on.
[range:tcp_port]
type = tcp
local_ip = 127.0.0.1
local_port = 6010-6020,6022,6024-6028
remote_port = 6010-6020,6022,6024-6028
use_encryption = false
use_compression = false
# 转发 DNS 查询请求
[dns]
type = udp
local_ip = 114.114.114.114
local_port = 53
remote_port = 6002
use_encryption = false
use_compression = false
# 转发udp请求
[range:udp_port]
type = udp
local_ip = 127.0.0.1
local_port = 6010-6020
remote_port = 6010-6020
use_encryption = false
use_compression = false
# Resolve your domain names to [server_addr] so you can use http://web01.yourdomain.com to browse web01 and http://web02.yourdomain.com to browse web02
[web01]
type = http
local_ip = 127.0.0.1
local_port = 80
use_encryption = false
use_compression = true
# http username and password are safety certification for http protocol
# if not set, you can access this custom_domains without certification
http_user = admin
http_pwd = admin
# if domain for frps is frps.com, then you can access [web01] proxy by URL http://test.frps.com
subdomain = web01
custom_domains = web02.yourdomain.com
# locations is only available for http type
locations = /,/pic
host_header_rewrite = example.com
# params with prefix "header_" will be used to update http request headers
header_X-From-Where = frp
health_check_type = http
# frpc will send a GET http request '/status' to local http service
# http service is alive when it return 2xx http response code
health_check_url = /status
health_check_interval_s = 10
health_check_max_failed = 3
health_check_timeout_s = 3
[web02]
type = https
local_ip = 127.0.0.1
local_port = 8000
use_encryption = false
use_compression = false
subdomain = web01
# 访问的域名
custom_domains = web02.yourdomain.com
[plugin_unix_domain_socket]
type = tcp
remote_port = 6003
# if plugin is defined, local_ip and local_port is useless
# plugin will handle connections got from frps
plugin = unix_domain_socket
# params with prefix "plugin_" that plugin needed
plugin_unix_path = /var/run/docker.sock
[plugin_http_proxy]
type = tcp
remote_port = 6004
plugin = http_proxy
plugin_http_user = abc
plugin_http_passwd = abc
[plugin_socks5]
type = tcp
remote_port = 6005
plugin = socks5
plugin_user = abc
plugin_passwd = abc
[plugin_static_file]
type = tcp
remote_port = 6006
plugin = static_file
plugin_local_path = /var/www/blog
plugin_strip_prefix = static
plugin_http_user = abc
plugin_http_passwd = abc
[secret_tcp]
# If the type is secret tcp, remote_port is useless
# Who want to connect local port should deploy another frpc with stcp proxy and role is visitor
type = stcp
# sk used for authentication for visitors
sk = abcdefg
local_ip = 127.0.0.1
local_port = 22
use_encryption = false
use_compression = false
# user of frpc should be same in both stcp server and stcp visitor
[secret_tcp_visitor]
# frpc role visitor -> frps -> frpc role server
role = visitor
type = stcp
# the server name you want to visitor
server_name = secret_tcp
sk = abcdefg
# connect this address to visitor stcp server
bind_addr = 127.0.0.1
bind_port = 9000
use_encryption = false
use_compression = false
[p2p_tcp]
type = xtcp
sk = abcdefg
local_ip = 127.0.0.1
local_port = 22
use_encryption = false
use_compression = false
[p2p_tcp_visitor]
role = visitor
type = xtcp
server_name = p2p_tcp
sk = abcdefg
bind_addr = 127.0.0.1
bind_port = 9001
use_encryption = false
use_compression = false启动命令
1
2
3
4
# windows
frpc.exe -c frpc.ini
# linux
./frpc -c ./frpc.ini2. 路由器梅林固件部署
在软件中心安装 frpc穿透 的软件

进入进行配置就可以了
四. 自己的frp服务端
1. frps.chc.cn
- ip : 127.0.0.1
| Docker内定义 | 内容 | 描述 |
|---|---|---|
| bind_port | 30000(TCP) | frps服务端口 |
| kcp_bind_port | 30000(UDP) | KCP加速端口 |
| bind_udp_port | 30001(UDP) | udp端口帮助udp洞洞穿nat |
| dashboard_port | 30002(TCP) | Frps控制台端口 |
| vhost_http_port | 30000(TCP) | http穿透的端口。 |
| vhost_https_port | 30000(TCP) | https穿透服务的端口 |
| token | teamfort | 连接认证码 |
| dashboard_user | teamfort | frps控制台用户名 |
| dashboard_pwd | teamfort | frps控制台密码 |
本博客所有文章除特别声明外,均采用 CC BY-NC-SA 4.0 许可协议。转载请注明来自 Chc-个人数据程序主页!